Copy, paste, copy, paste, copy, paste. Every professional designer knows that tedious project or job that makes their eyes cross. You know the one. The creative design is already in place, now it's your job to update key information or copy based on the client's request. Sometimes, even from a spreadsheet 😱 – the horror!
When I first worked on the Tobacco Settlement Endowment Trust (TSET) Local Impact Pages, I was tasked with updating grantee names and award numbers on over 200 local impact reports, many of which had over 25 items on a single page.
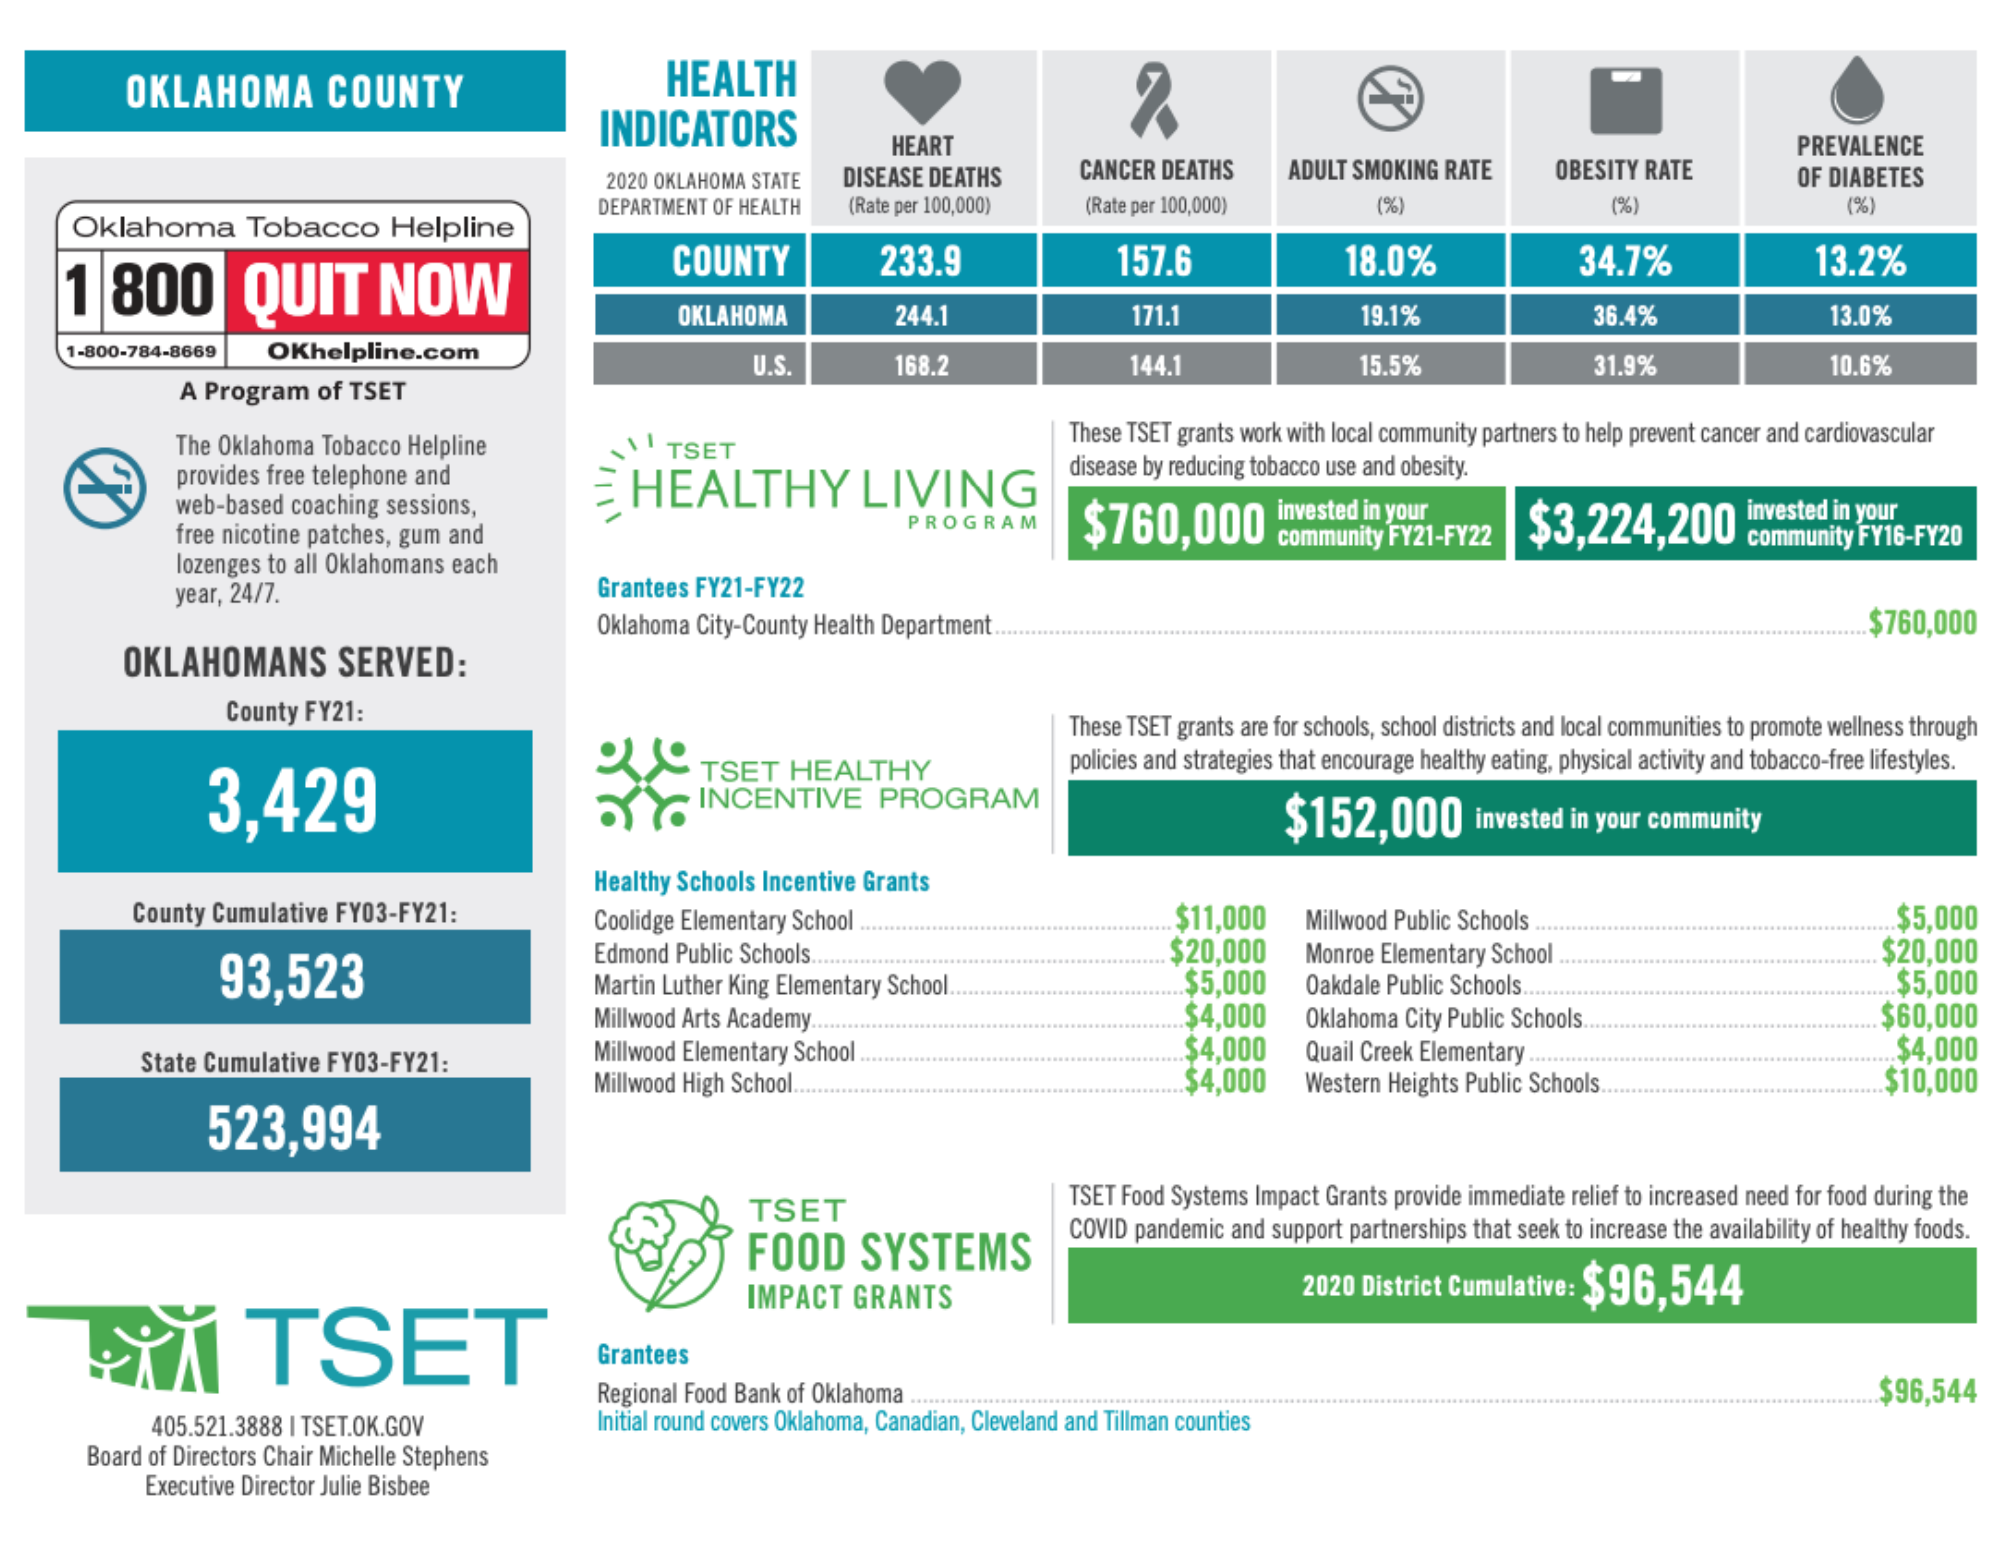 It was exciting to see the positive impact TSET has made in Oklahoma, however, it was a tedious and time-consuming process that included copying and pasting thousands and thousands of grantee names and award numbers. While the finished product was very rewarding, the process definitely took a unique toll on this designer's creativity and I knew there HAD to be a better way.
After plenty of research, I found some extremely helpful tools with Adobe InDesign and Microsoft Excel to save myself and my fellow designers time (and sanity!). Here are some of my best tips and tricks for harnessing the power of automation in Adobe InDesign:
1. Automatically Add Page Sizes When Exporting
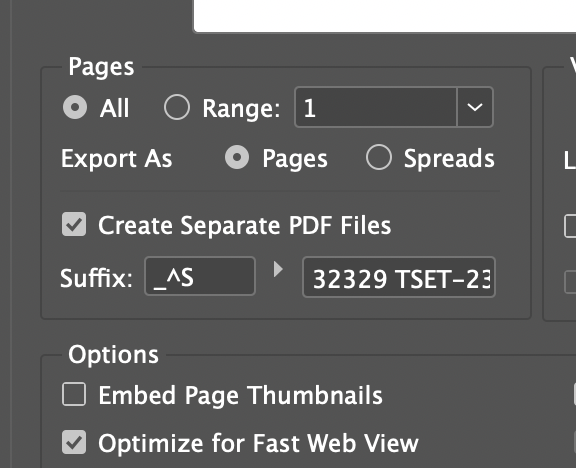
Whether you’re creating 6 different ad sizes, or 82, this tip is a lifesaver. Rather than checking your document size and pasting it to the end of the name, go to File>Export and select PDF. Check the box for Create Separate PDF Files. Under Suffix: Change the “P” to “S.” Your document will now put the page size at the end of its file name! (Note that sometimes it doesn’t include decimal zeros, so double check that, but it is still a huge time saver.) Now, if someone asks you to re-export the final files, you won’t want to murder them.
2. Utilize the Data Merge Tool
Two of the most useful ways I have found to use InDesign's Data Merge tool are for maps displaying data, and creative pieces with multiple data points, like TSET's Local Impact Pages. If you want to just use Data Merge for mailing addresses, Adobe has a great explanation here. However, if you want some more creative setups, read on!
Maps
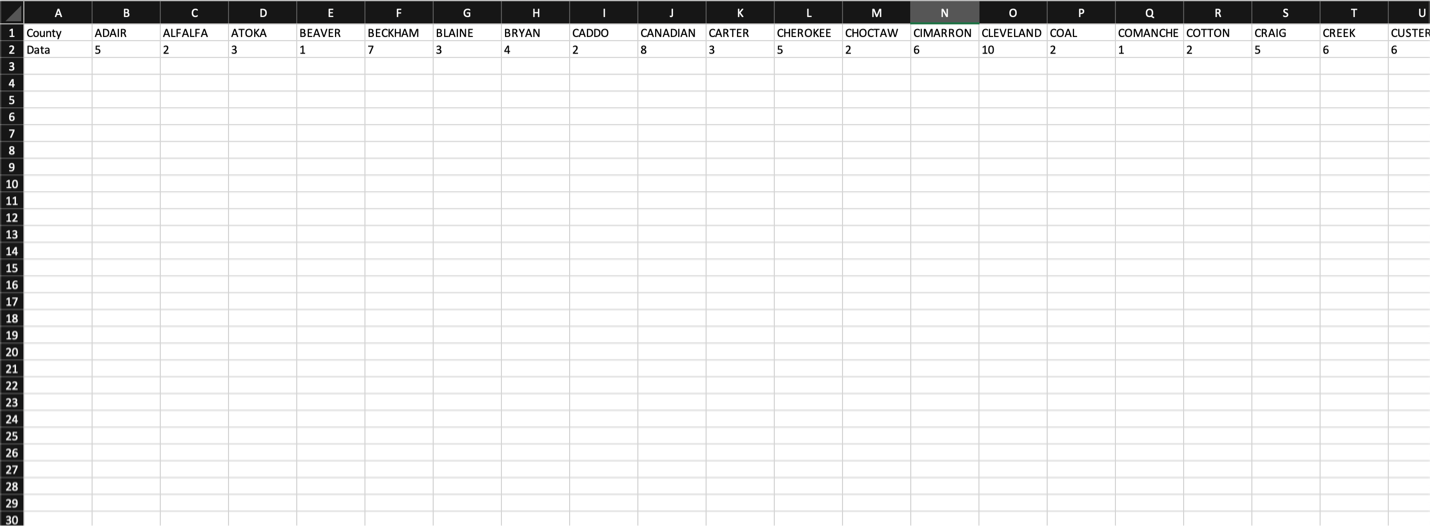
When working to update TSET's Local Impact Pages, I was tasked with updating data for each county in Oklahoma state on a map. Yes, all 77 of them. In order to save some time and reduce the risk of copy-paste errors, I decided to give Data Merge a try.
The key to using the Data Merge tool is that all information that you need on one page must be on the same line in your Microsoft Excel document. So I chose to use the first row as labels for corresponding data, with each county in Oklahoma listed alphabetically at the top and the updated numbers below.
Once you're finished, be sure to save your Excel spreadsheet as a .csv file.
To update your InDesign file with your new data, open your project and select the Source in the Data Merge panel and select .csv you just updated. Next, create a text box and click on the tag in the Data Merge panel. This will create the name of the tag bracketed by "<<>>". If your tag is cut off, your data will be fine, don’t worry about it. Hit Merge, and tada! All your updates will be made and your new numbers will be perfectly placed.
Multiple Data Points
When working to update a file with multiple data points, the risk of designer error is high when using the copy-paste method. That's why for TSET's Local Impact Pages, I chose to use Microsoft Excel and Data Merge in InDesign!
First, I set up the spreadsheet so that every piece of data for a page would be on one line. For example, on the House pages, the first section is Healthy Schools Incentive Grants (HSIG). I looked at the data and found the max number of grants we had for that section (17). I then made a column for the grant recipient’s name and money. HSIG-1, HSIG-1 $, HSIG-2, HSIG-2 $ etc.
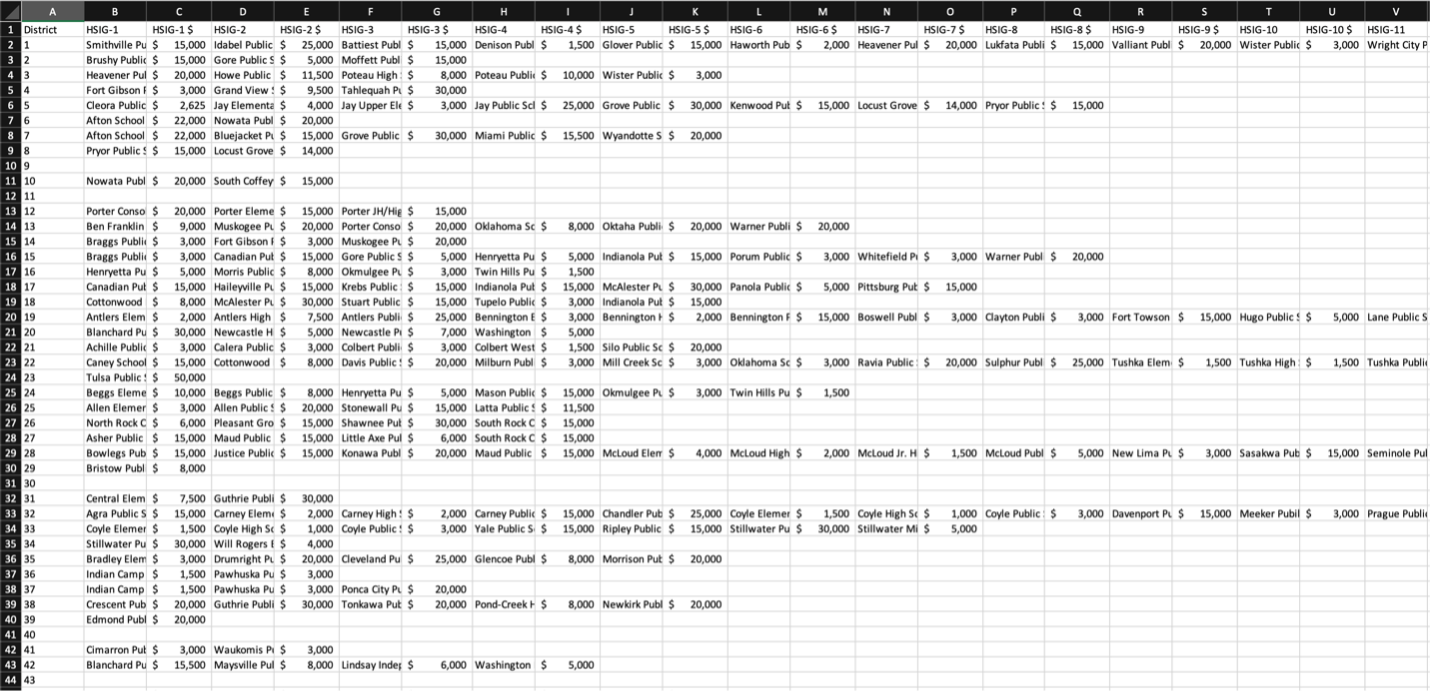
Setting it up this way is a little unconventional and takes some time, but it is worth it. It’s okay that some cells are blank. It’s easy to clean those up when formatting.
Boom, just like that! Over 6,500 pieces of data for the House were placed on their pages. You can see the finished product of the House, Senate, and Counties here. This strategy results in fewer errors and costs far less time and sanity than pasting over and over and over again.